Enjoying the freedom and flexibility of exploring with your campervan is made even better by a well-lit interior, provided through installing 12V LED lights. This guide shows you how to select, plan, and wire these energy efficient lighting options in order to create an inviting atmosphere while off the grid – ensuring safety as well as comfort for when it’s time to relax after an exciting day!
Key Takeaways
- Choose 12V LED lights for your campervan based on color temperature, brightness, and ease of installation.
- Plan lighting layout carefully considering task, ambient & accent lighting as well as switch placement.
- Follow steps to determine correct cable & fuse sizes. Install switches/dimmers for atmosphere control.
How to Hardwire 12V Lights in Your Campervan [Video Tutorial!]
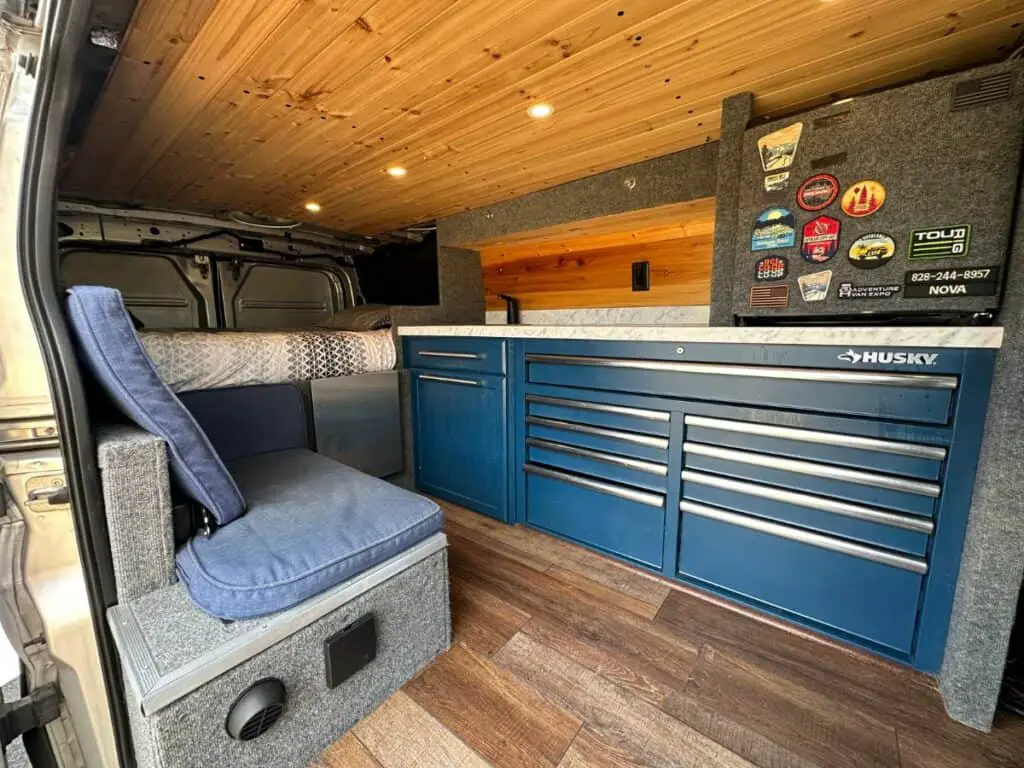
Choosing the Right 12V LED Lights for Your Campervan

When it comes to illuminating a campervan, LED lighting is the most suitable option. Its energy efficiency and low draw on batteries are just two of its many advantages compared with traditional incandescent or fluorescent light bulbs. There are several types available for van conversions – including strip lights, side lamps, recessed illuminations and puck-style units, each has different applications so understanding their distinctions can help you pick what will work best in your vehicle.
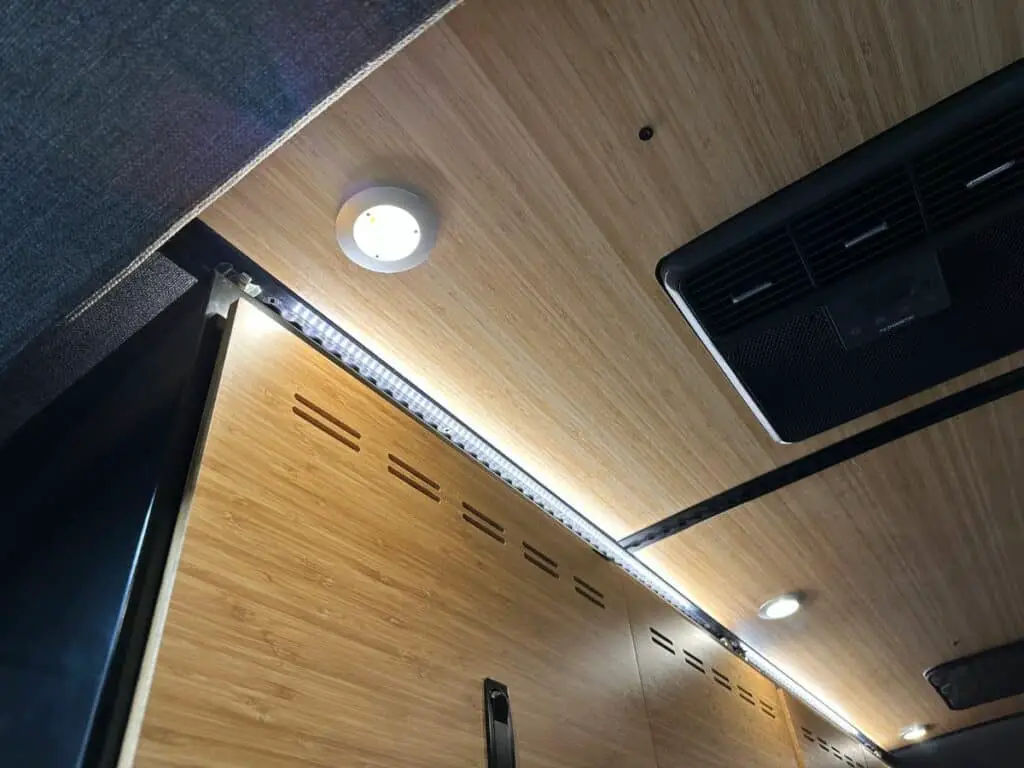
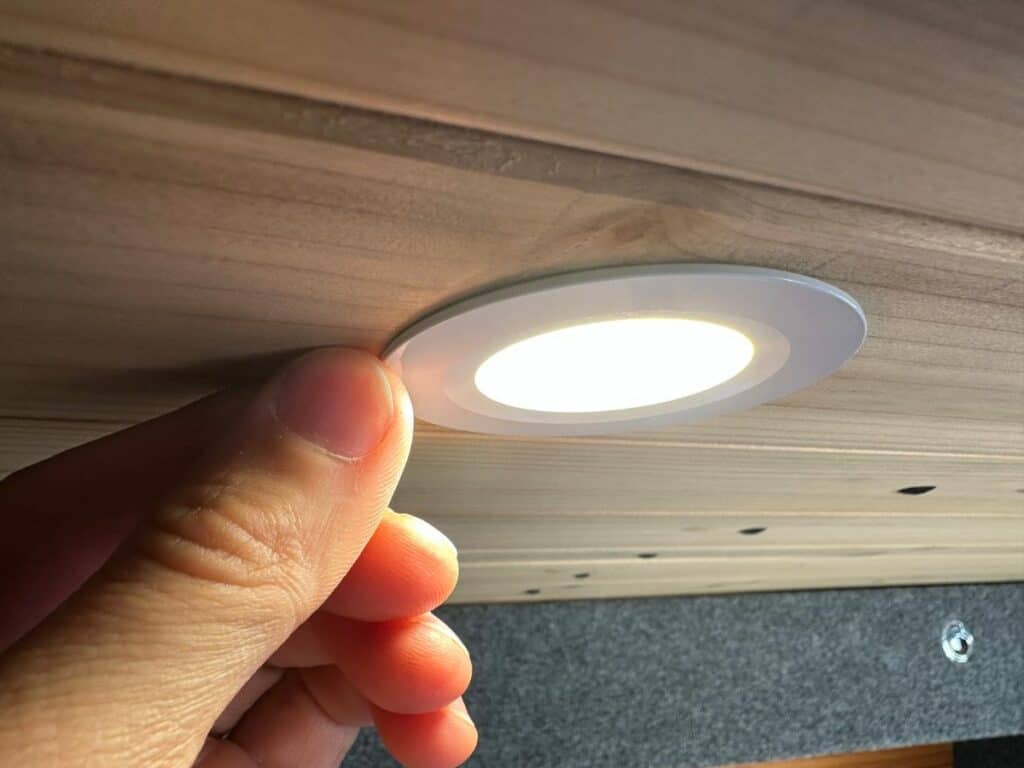
Puck lights provide spotlights that can be fixed to ceilings or cupboards efficiently. One could make an effective difference to the overall structure of lighting within your camperspace. Alternatively LED strips deliver adjustable brightness as well as flexibility which makes them ideal above cabinets such countertops, steps etc., The ACEGOO RV Puck Lights have this feature with warm white glow options also achievable if sought after according to preference.
Wiring 12V LEDs necessitates attaching red/black wires from leisure battery packs into those sets up cautiously following instructions provided in regarder wiring diagrams respectively. This would ensure efficient setups enabling people enjoying all benefits accompanied by these recent inventions.
Planning Your Campervan Lighting Layout
Achievement of an aesthetically pleasing and practical campervan interior requires a carefully planned lighting setup. Prior to starting your conversion, it is imperative to plan the position of 12V LED lights effectively. This should include considering task illumination for activities such as cooking or reading, ambient lightening in order to generate cozy atmosphere and accenting certain features with selective luminance.
When working on your layout structure, you must also take into account where switches will be located along with wiring paths that need taking into consideration too. Light switches should be easy to access close to their source, which may entail placing one at the entrance door controlling any external luminescence while another beside bedding region intended for use when wanting particular lit areas while engaged in studying etc. Wiring routes ought similarly taking mindful note off – minimized lengths helping prevent potential hazards from coming about alongside possible damage. Think sharp edges or high temperatures spots needing attention theretofore associated issues arise after installation has taken place!
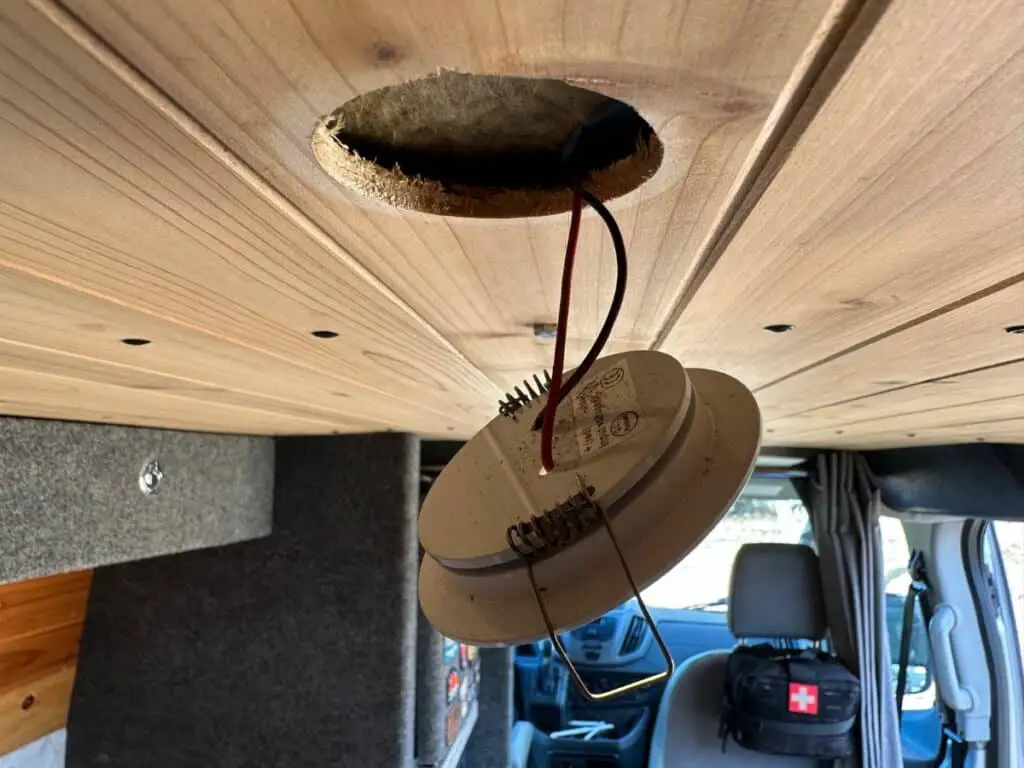
The fitting time frame related to constructing 12v LED components forms part vital role connected towards attaining required van set up finish desired – if using recessed styles suggest installing those prior firstly deciding affix metal surface/ceiling plank General completion achieved superbly then happen without hitches occurrence post rushing swiftly through making sure all leftovers redecorating tasks accomplished no fuss manner Following fabrication complete carried out suave look obtained thereby primary goal met fully ended not regretting electing pick this system like others used equally regularly nowadays modern days RVers go conduct projects everyday lives cheerily !
Essential Tools and Supplies for Wiring 12V LED Lights
For wiring 12V LED lights in your campervan, you’ll need the correct tools and supplies. Key items such as wire strippers, crimp connectors, cable clamps and electrical tape are necessary to carry out an effective installation. When it comes to device connections, GS Power 14AWG Red & Black Wire is recommended according to wire length. The 4 AWG gauge should be used for transmitting power into the fuse panel from a battery or generator source. Selecting suitable cables and fuses of appropriate size is important – 10mm should suffice when connecting between circuit breaker & battery, while multiplying current (Amps) by 1.5 will help decide on adequate fuse size if using dimmer switch option with 12V LED light circuitry. Different types of connectors like ring terminals (#8 16-14 AWG), female spade connectors (16-14 AWG), light switches USB A&C ports also butt connectors (16-14AWG) might be required depending upon type of lighting system one wishes to install.To ensure all pre requisitesare satisfied, it is essential to look at respective manuals/wiring diagrams before beginning actual wiring process itself.
Finally once you have appropriately organized materials needed for desired12v ledlight setup –commencewithactualempirical sequence mentioned in the instruction manual prior setting up illumination within the campervan interior!
Wiring Techniques: Series vs. Parallel
For wiring LED lights, there are two basic ways to go about it: series or parallel. When wired in a sequence like this, the lumens output of each puck light may differ from one another and is not Recommended for campervans where uniform lighting is desired. When setting up your RV lighting system using LED bulbs, connecting them all directly to the power source with paralleled circuitry will be most beneficial since it ensures that they generate equal lumen counts which stays consistent even if one goes out unexpectedly.
To achieve such connection, you can utilize an 8-way DC splitter by cutting off its heads as shown in appropriate wiring diagrams. This practical approach makes sure every single lamp receives enough juice while establishing the necessary protection within the installation process too, thus offering several advantages at once! So make sure you remember these guidelines before committing yourself into installing those little lanterns!
Step-by-Step Guide to Wiring 12V LED Puck Lights
Installing 12V LED puck lights in your campervan can be a challenging task, but it’s possible with the right tools and information. Start by planning out an efficient wiring route that will keep all cables tidy and secure. Gather any materials such as wire strippers, heat shrink tubing or electrical tape necessary to complete the installation process. Then use butt splicing, which involves inserting two wires into one connector, this creates a robust connection able to withstand motion while driving in your van. With a dimmer switch you’ll have control over lighting brightness levels for more comfortable surroundings inside of your vehicle. Consult the diagrams provided specific to these types of LED puck lights for accurate wiring guidelines when installing them along with their switches so everything is connected correctly upon completion.
For successful results from using 12V LED pucks, make sure you’ve followed each step carefully- connections are intact, trimming wires appropriately plus plenty of testing before finally having wired up those LEDs safely!
Installing and Wiring 12V LED Strip Lights
LEDs are a common choice for campervan lighting due to their convenience and easy installation. To begin the process of 12V LED strip light setup in your vehicle, attach them to surfaces like under cabinets, countertops or steps, trimming as required. Then secure connectors for complete fitting.
Connect positive and negative wiring from the fuse box to where the LEDs will be situated. Factor in the wire length here too. After linking up with the power source securely, finish off by adding an accompanying dimmer switch next to it so that brightness can be controlled easily at any time!
With these straightforward methods put into practice successfully, you should have fully installed wired 12V LED lights onto your van giving customizable atmosphere when needed!
Connecting 12V LED Lamps in Your Campervan
In order to connect 12V LED lamps in your campervan, you will need to wire them up in parallel. This method allows for multiple lights connected together so that if one light fails, the others continue working with an even brightness. To link up the side lamps and wires, it is recommended to use heat shrink tubing on the black wire connection which helps protect against vibrations or movement inside of your vehicle. For joining between wires themselves for these LEDs, utilizing T-tap connectors along with wiring diagrams should be used when connecting all elements properly.
By completing this setup process carefully following the instructions here provided regarding setting up 12V LED lighting options within your campervan. A great outcome may potentially be achieved through successfully having these various kinds of lighting sources correctly wired into place!
Troubleshooting Common Issues: Flickering LED Lights
LED lights can often flicker in campervans due to high power demands from the inverter or other devices. A reliable solution is adding a robust pure sine wave inverter and linking it directly to your leisure batteries during van conversion, this will ensure that LED lighting functions at its optimal level. Regularly checking wiring connections and electricity sources also helps you detect any potential issues beforehand so they don’t cause damage down the line. With these tips, 12V LEDs guarantee brightness while still providing an inviting atmosphere inside your vehicle. Ensuring enjoyable trips all around!
Determining the Correct Cable and Fuse Sizes

Installing 12V LED lights correctly is vital for their safe and efficient operation. It requires careful consideration of the wire length, current draw in amps, voltage drop, as well as selecting suitable cable and fuse sizes to protect your wiring against potential hazards such as overheating or fires. A helpful tool like the Blue Sea Systems Circuit Wizard Calculator can help you with calculations required before determining the correct size of cables and fuses needed for this application.
To select an appropriate sized fuse: calculate first total power consumption/amp rating. Add 25% buffer to that number then pick a rated power corresponding it, this will ensure protection of your lighting system from possible harm caused by overloads etc. When these steps are done properly along with picking proper wires for running LEDs installations, they become reliable sources providing long term bright light during all campervan adventures!
Wiring Light Switches and Dimmers
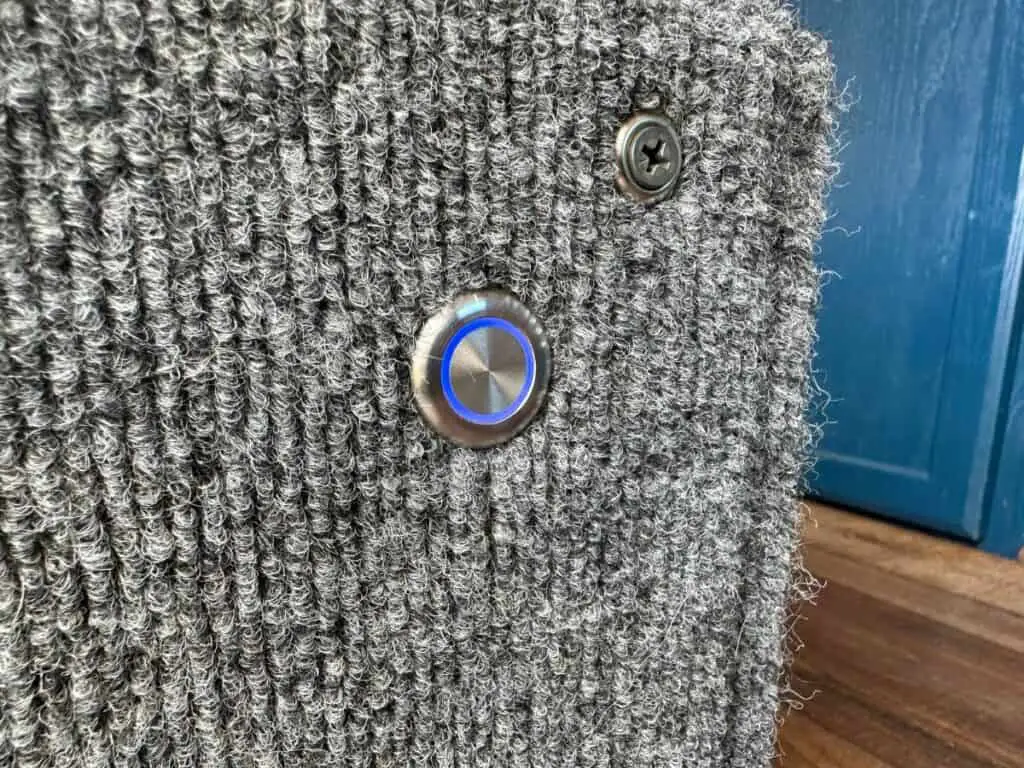
Including switches and dimmers in your campervan lighting setup can provide increased functionality, control the atmosphere of the interior space and ultimately create a comfortable environment that fits one’s needs. To wire up these features, you must refer to appropriate diagrams for guidance on how best to secure connections between switch panels and LED lights. Installation should be done in an accessible location with care given so as not to compromise any components or safety measures. Ultimately, incorporating light fixtures such as this will result in adaptable illumination tailored just right for you!
Summary
To round things off, 12V LED lights may seem like a daunting challenge to install in your campervan, but with the correct supplies and advice it can be completed for an impressive effect. Start by coming up with a lighting layout, choosing the best LED fixtures available and following instructions step-by-step for successful wiring of those lights. A well lit interior space not only looks great, but also provides peace of mind while you are on adventures away from home. We hope this guide has offered some useful guidance so that you have all the necessary confidence when tackling your project – don’t wait another moment! Get started right now towards illuminated travels!
Frequently Asked Questions
Can you wire 12 volt LED lights in series?
Yes, you can wire 12 volt LED lights in series, as long as you only use three LEDs in one circuit to ensure the voltage requirement is met.
How do you connect LED lights to a 12V battery?
To link LED lights to a 12V battery, get some clips and attach them firmly to the terminals. Insert the light bulbs in line with the arrows on their slots then plug into place for an effective connection.
What types of 12V LED lights are available for campervans?
When looking to get 12V LED lighting for campervans, there are a range of options including strip lights, puck lights, side lamps and dome or recessed lighting. All the mentioned types offer great illumination suitable for your vehicle’s interior design without having to settle on one single option.
How do I troubleshoot flickering LED lights in my campervan?
In order to solve the issue of flickering LED lights in a campervan, it is advisable to purchase a larger and higher quality pure sine wave inverter. Connecting this directly from the leisure batteries should ensure that excessive electricity consumption does not occur, thereby supplying enough power for these lighting fixtures. By taking these steps one can rest assured that their battery supply will be able to handle such an energy draw without any Problems occurring as a result.
Should I install light switches and dimmers in my campervan lighting setup?
Lighting can be an important part of making your campervan comfortable and inviting. LED lighting is a great choice to provide energy efficiency. Practical control solutions such as installing switches or dimmers. This allows for the brightness level of lights inside the vehicle to be adjusted, creating an atmosphere which fits one’s taste while providing convenience when operating them. Ultimately, with these light controls you will have all that’s needed to achieve satisfactory conditions within your campervan interior according to needs and preferences!