 Build Guides
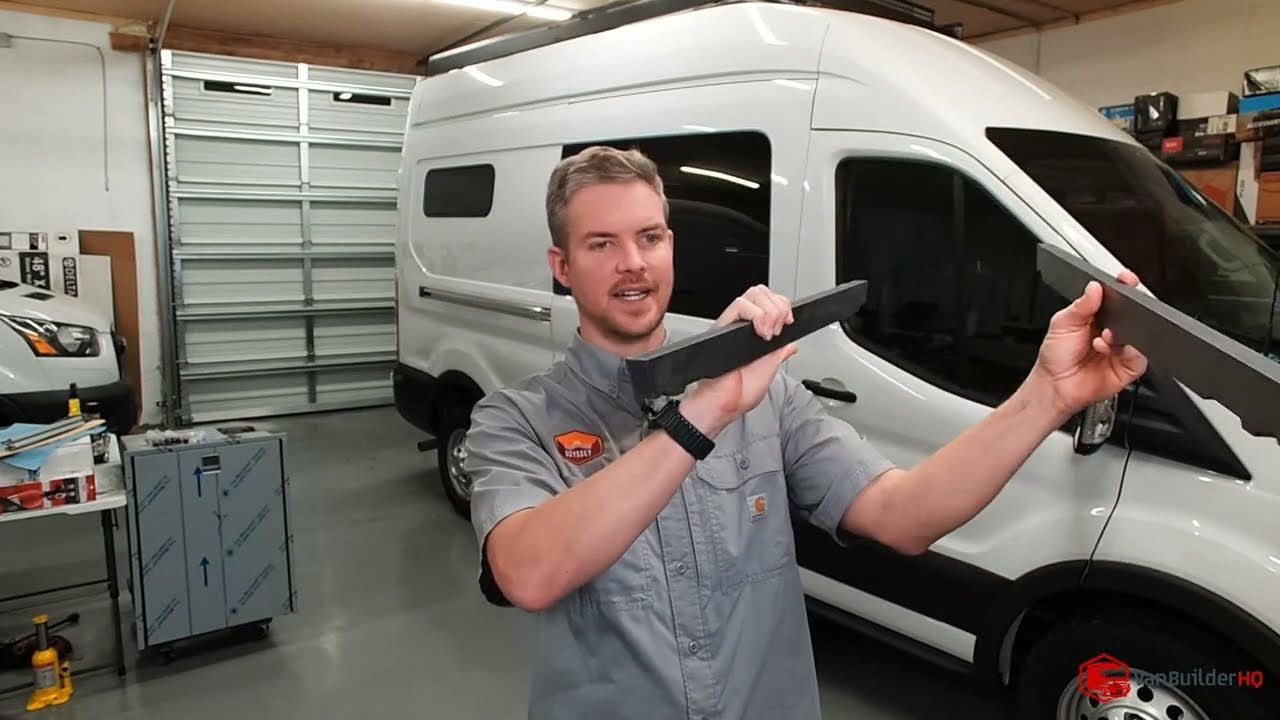
 Flatline Van Co Roof Rack Installation Guide (New Version)
A step-by-step guide to installing the new version of the Flatline Van Co roof rack on a 2020 Ford Transit Mid-Roof, including faring and solar layout tips.
Learn how to plan a functional, safe camper van roof layout covering vent fans, solar panels, roof racks, AC units, awnings, lighting, and wiring.
Designing your camper van's roof layout can feel overwhelming. Between vent fans, solar panels, roof racks, AC units, awnings, and lighting—your limited space fills up fast. In this guide, we'll walk you through the key decisions and layout strategies to help you plan a functional and safe roof design tailored to your van and travel needs.
Whether you're building a weekend escape vehicle or a full-time off-grid home, a smart roof accessories layout is critical.
Before you touch the roof, finalize your interior floor plan. Why? Because the placement of your bathroom, sleeping area, and kitchen directly affects where you'll need ventilation and lighting from the top down. For example, you'll want a vent fan near your shower or toilet, and possibly another one over your bed.
A roof rack does more than provide a platform for solar and storage—it reinforces the flimsy skin of your van's roof. Most van roofs (like the Ford Transit) aren't welded but glued on with adhesive. This means they're not designed to carry weight without support.
Flatline Van Co makes sleek, low-profile racks that bolt directly into Ford's factory mounting points, giving you structure and safety. Their racks also support accessories like awnings with pre-drilled mounting holes.
Pro Tip: If you're planning to install solar panels, lights, or an AC unit, a roof rack is highly recommended to safely distribute the weight and simplify installation.
If you own a Ford Transit (low, medium, or high roof), your roof has structural ribs—and those ribs dictate where you can cut holes for fans or accessories. For a 148" high-roof Transit, expect 3–4 ribs spaced across the length. You'll want to align heavy roof accessories like vent fans or AC units with these ribs for strength.
One common layout includes:
This setup fills the roof fast. Between the crossbars of your rack, the vent cutouts, and the solar panels, you'll have little space left for storage or extra equipment. But it offers excellent airflow and power capacity—ideal for full-time travelers.
Adding an air conditioning unit, such as one from Nomadic Cooling, means sacrificing roof space. A rooftop AC often replaces your rear solar panel or second vent fan. These units are large and heavy (80–100+ lbs), so make sure your roof rack and van can support the added weight.
Want to mix solar panel sizes? You'll need dual solar controllers to manage different voltages and currents safely.
Most premium roof racks are compatible with popular awnings like the Fiamma F45s or Dometic electric models. Dometic's self-supporting awnings are worth the investment—they fully extend with one button and don't require manual leg supports.
If your rack has pre-drilled holes for awning brackets (like Flatline's), installation is simple. Just make sure your awning doesn't interfere with your lighting or wiring.
Install scene lights on both sides and the rear of your van for nighttime visibility. These are especially useful at camp or when reversing. Some awnings even come with integrated lighting, saving you space and wiring hassle.
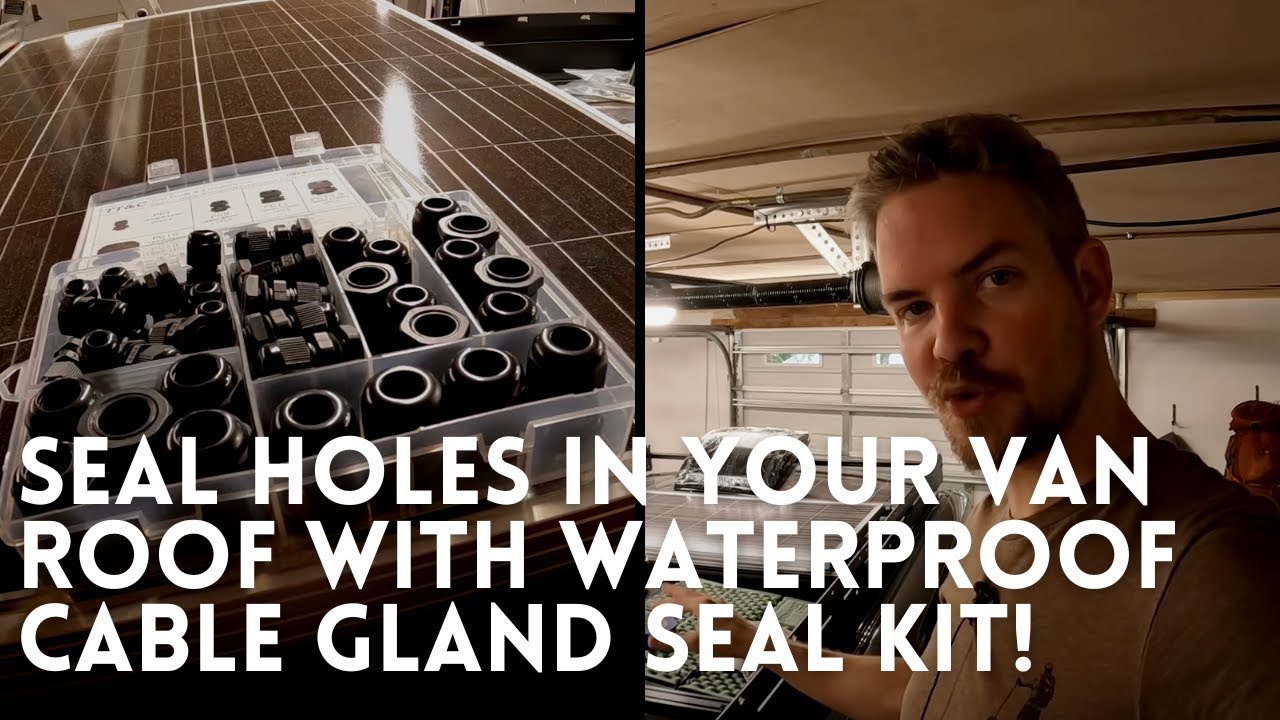
Be strategic: Plan your wire entry points to keep your cables clean and serviceable. Avoid large multi-wire holes. Instead, use individual waterproof cable glands for each run. These are easier to reseal and repair.
Related: How to Seal Camper Van Roof Holes Using Cable Glands
For running wires from roof components into the van:
Ford Transit roofs are rated for:
Add up your accessories:
You'll quickly reach your limit—especially with a high roof. Always consult your vehicle's manual and aim to stay under the threshold.
| Component | Notes |
|---|---|
| Roof Rack | Choose a low-profile rack that uses factory mounts |
| Vent Fans | Position over kitchen, bathroom, or sleeping area |
| Solar Panels | Maximize wattage within weight limits |
| Rooftop AC | Plan for weight and power draw |
| Awning | Consider self-supporting vs. manual |
| Lighting | Add side and rear scene lights |
| Wiring Access | Use individual cable glands, avoid crowded holes |
Planning your roof layout is a critical part of your camper van build. From weight distribution to wiring strategy, it pays to take the time up front to map things out. A solid layout ensures better airflow, reliable power, and a more comfortable van life experience.
If you found this helpful, check out our other roof install tutorials or leave a comment with your questions. We'll be breaking down vent fans, solar arrays, and 12V AC systems in future blog posts—so stay tuned!
Build Guides A step-by-step guide to installing the new version of the Flatline Van Co roof rack on a 2020 Ford Transit Mid-Roof, including faring and solar layout tips.
 Build Guides
 Learn how to professionally seal camper van roof holes for solar, antenna, and accessory wiring using marine-grade waterproof cable glands.
 Build Guides
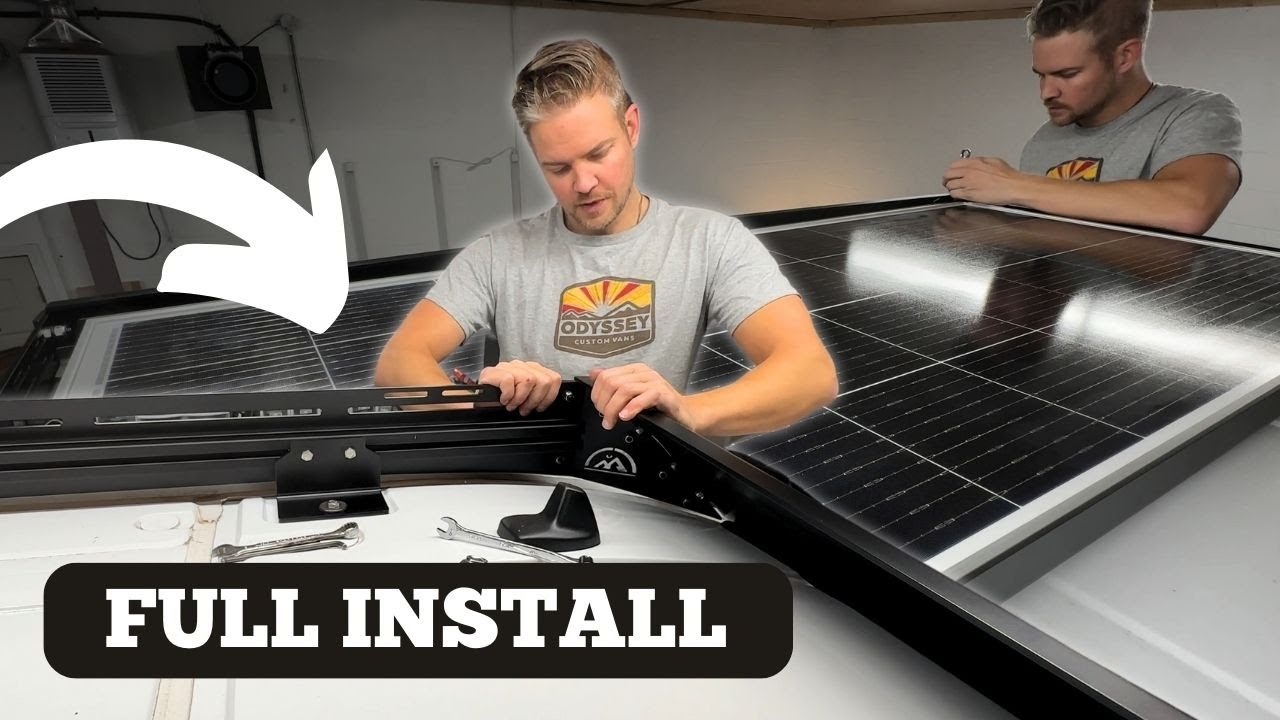
 Installing the solar-ready Unaka Explorist.life roof rack on a Ford Transit — roof prep, rail assembly, wind fairing, and solar panel mounting.
 Build Guides
 A step-by-step guide to building a fold-down Murphy bed in a medium roof Ford Transit using 8020 aluminum framing and spring-loaded hinges.