 Build Guides
 Building a Murphy Bed System in a Camper Van: Step-by-Step Guide
A step-by-step guide to building a fold-down Murphy bed in a medium roof Ford Transit using 8020 aluminum framing and spring-loaded hinges.
A DIY install of a Raptor-style grill, new front bumper, and yellow fog light bulbs to give your Ford Transit a rugged, off-road look.

If you're looking to give your Ford Transit a rugged, off-road look while upgrading some practical features, this guide walks you through a detailed DIY install of the Raptor style grill, a new front bumper, and yellow fog light bulbs. Whether you're upgrading due to cosmetic damage or just want to customize your van's front end, this step-by-step process shows you how to do it right.
This project started as a cosmetic repair for a new Ford Transit that arrived from the dealer with superficial bumper damage from transport. But while replacing the bumper, the opportunity was taken to:
Here's a quick list of tools and parts used in this build:
Tools:
Parts:
Pro Tip: Use a tray with compartments to organize your bolts and clips during disassembly.
The factory grill is held in by multiple plastic clips along the top, sides, and middle. Use a plastic trim tool or carpenter's pencil to gently pry each section loose without scratching the surrounding paint.
To fully remove the bumper:
Once disconnected, set the bumper aside. You'll also need to:
This Raptor grill is a genuine Ford product from the European Transit Trail. You can find it on eBay by searching:
"Ford Transit Trail Raptor Grill UK"
Make sure to order the correct version:
To install:
If you want a yellow-tinted fog light look without installing aftermarket LEDs, try this:
Caution: Some LED replacements may cause flickering or error codes. Stick with halogen for plug-and-play reliability.
Test all lights (especially fog lights) before completing assembly.
This upgrade not only gives your Ford Transit a beefier, off-road-ready appearance but also:
The Transit Trail Raptor-style grill is a direct fit for 2020+ Ford Transit vans and adds serious attitude to your build without affecting function.
The site has compiled over 250+ tools and parts into a free DIY Van Build Cheat Sheet—curated from years of actual Amazon purchases used in real van conversions.
It includes:
Want more Ford Transit install tutorials? Subscribe to the YouTube channel and follow VanBuilderHQ for real-time van conversion livestreams and product tips.
Build Guides A step-by-step guide to building a fold-down Murphy bed in a medium roof Ford Transit using 8020 aluminum framing and spring-loaded hinges.
 Build Guides
 A guide to adding a stylish floor step or trim to your Ford Transit camper van, covering materials, safety, DIY steps, and pre-made options.
 Build Guides
 Installing an aftermarket Raptor-style grille on a 2019 Ford Transit — sourcing, tools, trimming, and a cable-clamp hack for a flush, factory-look fit.
 Build Guides
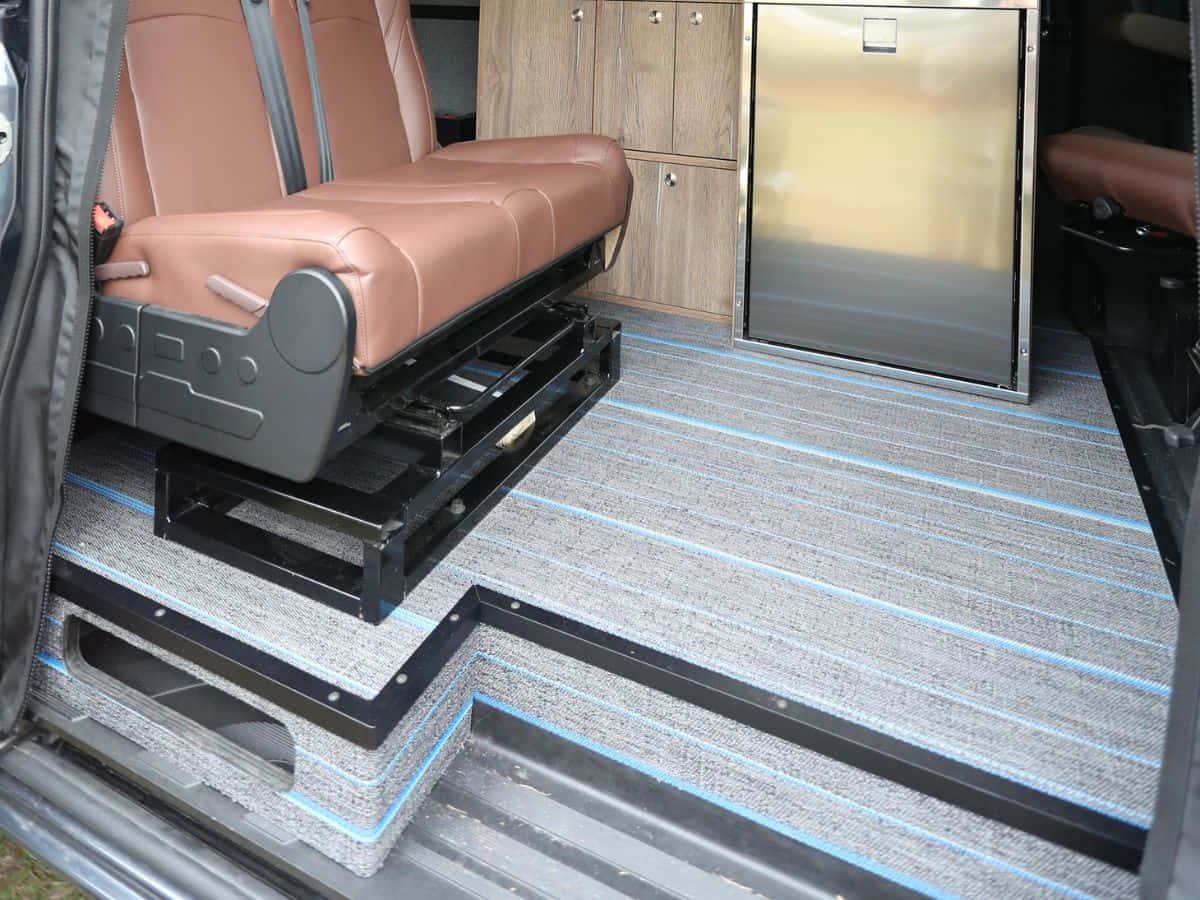
 How to plan a camper van floor layout using the Ford Transit, with tips on in-floor shower pans, flip-and-fold seating, and custom cabinetry.